

Region: Lysefjord, Rogaland, Norway
Walk summary: This 6.1-mile Kjerag hike starts at Øygardstøl beside Kjerag Café & Restaurant and crosses three demanding granite climbs to Kjeragbolten. The main GPX follows the established circular variation, although deep snow meant we returned by our outward route for safety. It has 2,520ft of ascent and took us approximately 5½ hours including breaks and an hour at the boulder.
| Distance | 6.1 miles / 9.8km |
|---|---|
| Ascent | 2,520ft / 768m |
| Walking time | Approximately 4 hours 10 minutes |
| Total time | Approximately 5½ hours with breaks and time at Kjeragbolten |
| Difficulty | Strenuous — steep granite slabs, fixed chains, repeated climbing and exposed mountain terrain |
| Route | Main circular variation shown by the GPX; our snowy walk returned by the outward path |
| Start and finish | Øygardstøl/Kjerag Café & Restaurant car park |
| Suitable for | Fit and experienced mountain walkers comfortable using chains on steep rock |
The Kjerag hike leads to one of Norway’s most recognisable landmarks. Kjeragbolten is a huge boulder wedged in a mountain crevice high above Lysefjord, but reaching it requires a serious hike over smooth granite, repeated climbs and several steep sections protected by fixed chains.
This is not a beginner’s introduction to mountain walking. The chains are there because the rock is steep and can be extremely slippery. The plateau is exposed, fog can hide the trail markers, and snow or ice can transform the route into a technical undertaking requiring winter skills, specialist equipment and potentially a guide.
Places to stay: We travelled from the Stavanger area. You can find accommodation in Stavanger or browse places to stay around Lysefjord.
Kjerag hike map, GPX and parking
- Parking and trailhead: Kjerag Café & Restaurant/Øygardstøl car park. Parking is paid.
- Road access: The mountain road is extremely steep and includes a long tunnel and tight bends. Do not attempt to walk through the tunnel or along the access road. Arrive by car, motorcycle or an appropriate seasonal bus service.
- GPX: Download the main Kjerag circular-route GPX.
- Route apps: View the route on Outdooractive or Komoot.
- Facilities: Toilets, food and drinks are available around the paid car park and restaurant when open. There are no normal visitor facilities on the trail.
The trail is marked by red T symbols painted onto the rocks. They are generally easy to follow in clear weather but can disappear beneath snow or become difficult to see in fog. Download the route for offline use and check current road, parking, transport and trail conditions before travelling.
Kjerag hike route description
We reached the trailhead after travelling by ferry from Lauvvik to Lysebotn with our cars, then driving the steep mountain road to Øygardstøl. The road, tunnel and hairpin bends make the journey an adventure before the hike has even begun.
At the car park, a local guide reminded us to read the safety information and follow the red T markers. That advice became particularly important because thick fog and lingering snow affected the upper route during our 2025 walk.
The first granite climb
The route starts with a steep climb almost immediately. Smooth granite rises from the trailhead towards the first ridge, with fixed chains provided across the steepest sections. The rock was wet and slippery during our hike, making careful foot placement essential.


The chains should not be treated as an optional novelty. They provide security on steep slabs where water, worn granite, snow or ice can remove traction. Maintain space between walkers and wait until the section ahead is clear.
The second climb and mountain valleys
After crossing the first ridge, descend into a shallow valley containing a stream. Losing height may feel frustrating because another granite wall is already visible ahead.


The second ascent again combines steep rock, large steps and fixed chains. We moved steadily, stayed together and made sure everyone was comfortable before continuing. Any of these major climbs can become a sensible turnaround point if conditions or confidence deteriorate.


Beyond the second ridge, the trail drops into another shallow valley and crosses a stream. Even the descents demand concentration because smooth granite can be harder to negotiate going down than climbing up.
The final climb to the Kjerag plateau
Near the mountain shelter, the third major ascent begins. This is another substantial climb over bare rock, with chains and large steps helping walkers gain the plateau.


Once the climb is complete, the character changes. The broad plateau is flatter, but far more exposed to wind, fog and snow. In clear weather this section opens towards Lysefjord; during our hike, the landscape disappeared into thick fog and large snow patches covered parts of the route.
Follow the painted markers carefully across the plateau. Deep snow can hide both the symbols and hazards beneath the surface. I would not recommend attempting the route in substantial snow without an experienced guide and the proper winter equipment; icy chain sections may require technical protection and skills.
Reaching Kjeragbolten
Near Kjeragbolten, the trail crosses rocky ground and descends slightly towards the viewing area. The surrounding landscape is extremely exposed, with enormous drops towards Lysefjord.


None of our group stepped onto the boulder. In person, it felt far higher and more dangerous than photographs suggest, and the movement onto it looked uncomfortable. Stepping onto Kjeragbolten is entirely optional; reaching the location and viewing it is already a major achievement.
We spent approximately an hour resting, eating, taking photographs and watching other walkers. Because it was outside the main season and very foggy, there was no queue.
Our snowy return route
The GPX supplied on this page follows the recognised circular variation, which uses an alternative section before rejoining the main trail. We intended to follow it, but snow made that option less sensible on the day.
We therefore turned around and returned by exactly the same route used on the outward journey. That decision kept us on terrain we had already assessed. The total route facts above describe the approximately 6.1-mile main route, while this narrative honestly records our safety-led deviation.
Descending the wet granite was at least as difficult as climbing it. We used the chains to lower ourselves carefully and maintained plenty of space between people. If weather, snow depth, visibility or confidence deteriorates at any point, turning around by the known outward route is a valid decision.

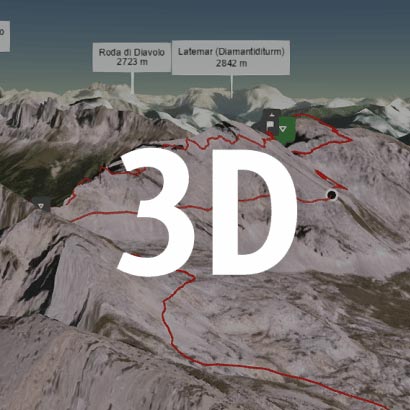
Preview the Kjerag route in 3D
Watch the route before setting out to understand the repeated granite climbs, plateau and location of Kjeragbolten.
Kjerag hike practicalities
- Parking: Paid parking is available beside Kjerag Café & Restaurant at Øygardstøl. Check current access, charges and opening arrangements before travelling.
- Difficulty: Strenuous. The hike requires good fitness, balance and confidence using chains on steep granite.
- Navigation: Follow the red T markers but carry an offline GPX and backup navigation. Fog and snow can hide the painted route.
- Underfoot: Smooth granite slabs, large rock steps, shallow valleys, stream crossings, chains and exposed plateau terrain.
- Weather: Wet rock is exceptionally slippery. Fog, strong wind, snow and ice can turn the route into a far more serious undertaking.
- Winter conditions: Do not attempt deep snow or icy chains without the appropriate experience, equipment and potentially a qualified local guide.
- Beginners, children and dogs: I would not recommend this route for inexperienced beginners, children or dogs. The chains, slippery slabs and exposure demand mountain experience.
- Kjeragbolten: Stepping onto the boulder is optional and carries an obvious fall risk. We chose not to attempt it.
- Food and toilets: Facilities are available at the trailhead when open. Carry sufficient food, water, clothing and emergency supplies for the entire mountain route.
- Turnaround options: You can reverse the outward route at any stage. Do not allow the desire to reach the boulder to override worsening conditions.
Kjerag and Kjeragbolten FAQs
How long is the Kjerag hike?
How long does the Kjerag hike take?
Is the Kjerag route circular or out and back?
How difficult is the Kjerag hike?
Can beginners hike to Kjeragbolten?
Do you have to step onto Kjeragbolten?
Can you hike Kjerag in snow?
Can children or dogs complete the Kjerag hike?
Are there toilets and food at Kjerag?
More Lysefjord walks: Explore my Lysefjord hiking guides, including the Preikestolen/Pulpit Rock hike.